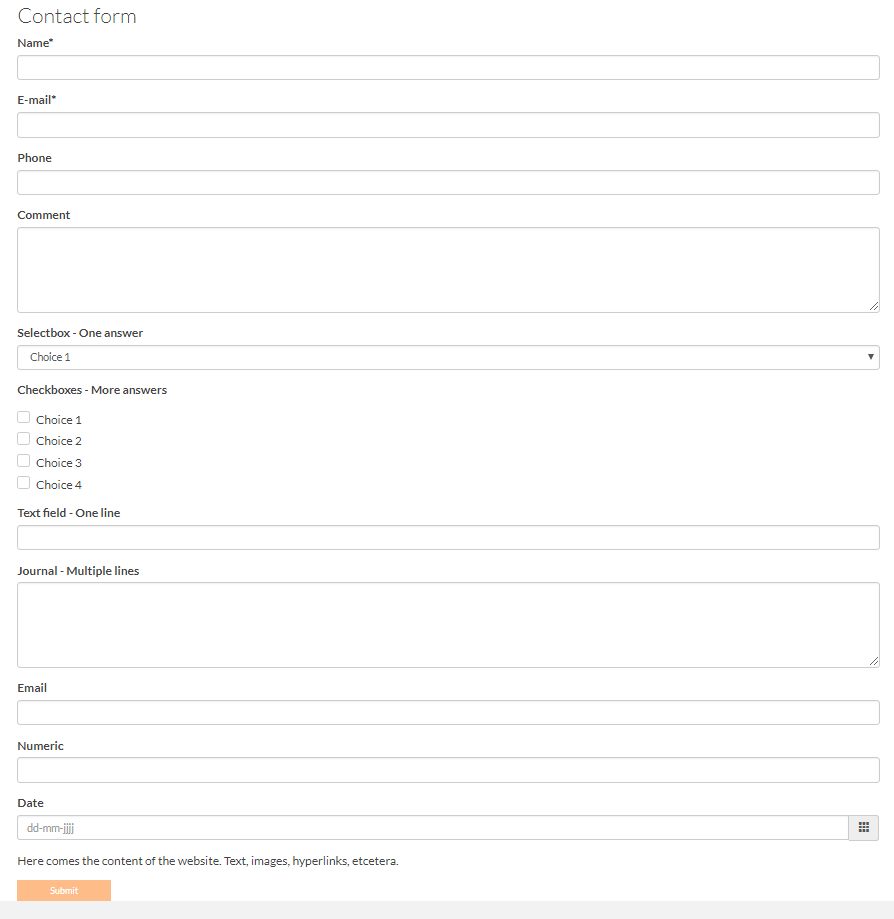
In Website Management you can easily create forms with which you can easily (additional) information to your visitors can ask, new members can register or people register for activities.
e-Captain has two types of forms.
• General forms, which you create yourself on the basis of freely selectable fields
• Member management link forms, which you create on the basis of the available fields from the Member Management.
To create a General form, think for example of a contact form for your website or a survey form, go to the section Forms in Website Management.
• Click on the yellow plus + icon in General to create a new form.


We will come back later to the other settings in the Characteristics.
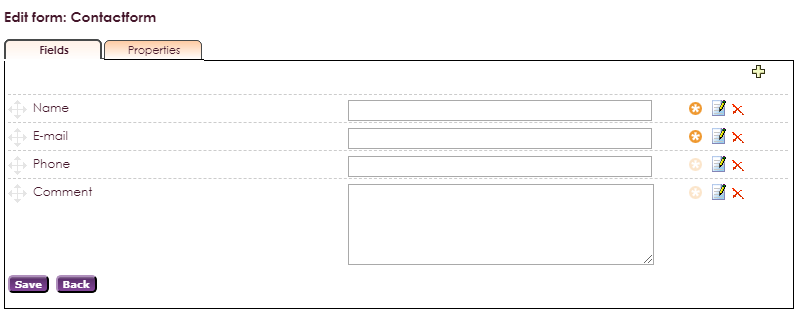
• Go to the Fields tab to create the desired form fields.
• Click on the yellow + to add a field.

You can choose from the following options:
List of choices (1 answer):
The user can only select one item in the list of choices (drop down menu)

Ticking boxes (several answers):
The user can tick multiple boxes in the list of choices.


Text field (a line):
A text field where the user can enter a short text. For example for Name, address, living area data.


Memo field:
A more extensive text field where the user can provide additional comments or explanations.


E-mail field:
In this field, the user can only enter an e-mail address


Numeric field:
Only numbers can be entered in this field.


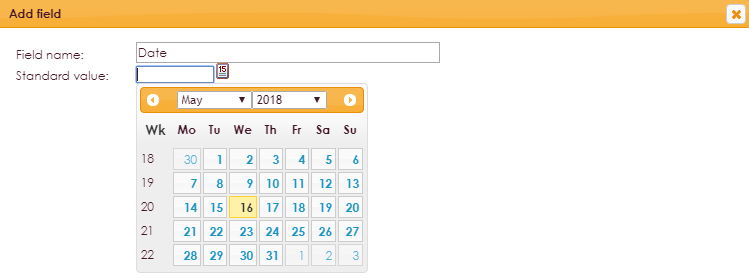
Date field:
Only a date can be entered in this field. This can also be selected by clicking on the calendar icon.

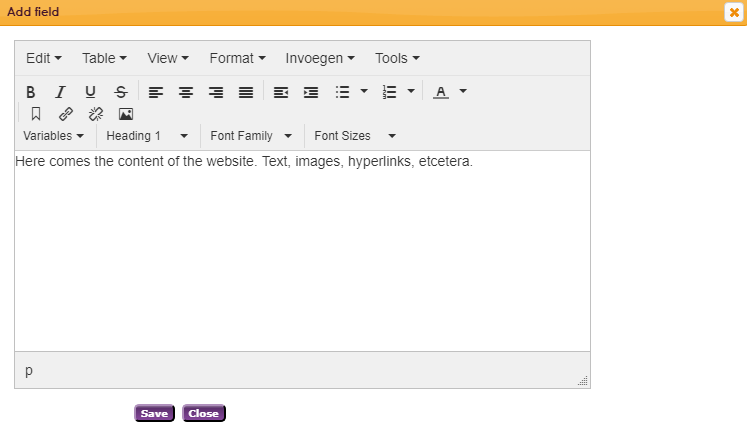
Created text:
With this you can add an explanation to the form.

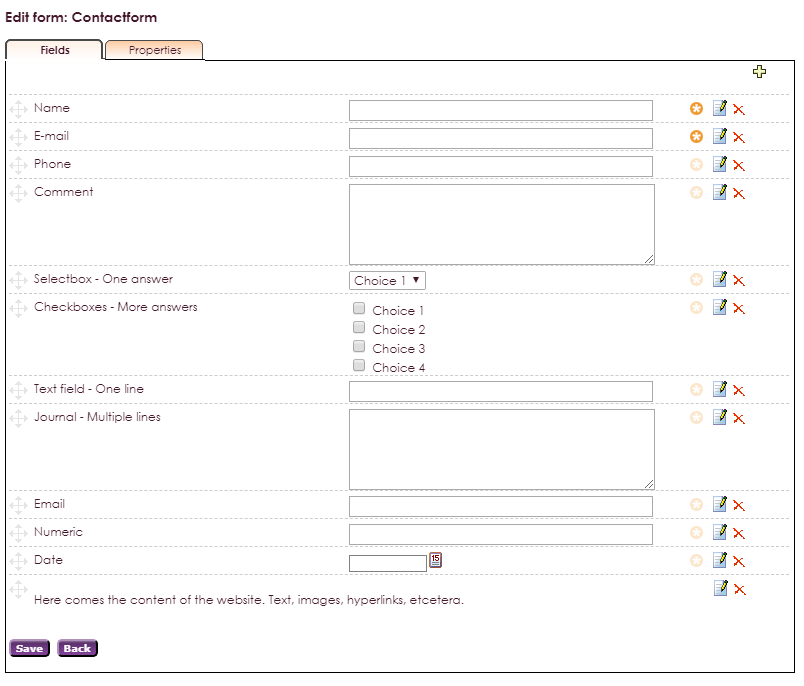
You can change the order of the fields by moving the fields to the right place with the move icon. Do not forget to click on the purple Save button again.
Where are the completed forms stored?
Depending on the settings in the Properties tab, the completed data is mailed to the specified e-mail address of the association. In addition, the data is always stored in e-Captain itself with the form.
• Go to the desired form in Website Management and click on the View received data icon data icon ![]() .
.


To create a Member Management link form, go to the Forms section in Website Management. There you choose member management link and then you choose:
• Forms for companies
• Forms for people
• Forms for companies and individuals
The great advantage of a member management link form is that the information entered is stored as an external transaction in the member management. There, the information only needs to be accepted and then this information is stored directly on the membership card. You no longer have to take information from a form or paper document.
By default, two forms have already been created for the Membership management link forms. Namely the registration form (my captain) with which new members can register and register an Activities (standard form) form with which someone can register for participation in an activity.
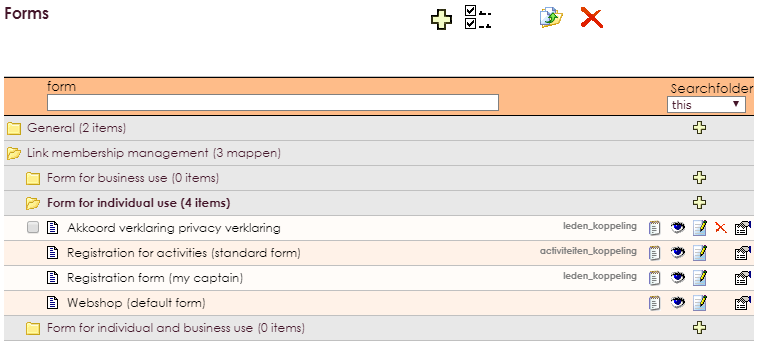
Important to know when working with member management link forms is that when adding fields to the form you can only use fields that are also used in the member management. If you want to know specific information, you can create free fields or groups in the Member Manager.
To create a new Member Management link form (or to change an existing one) go to Website Management and select the Forms option.
• Then select Member management link.
• Click on the yellow + for Forms for people to create a new form for persons.
• e-Captain will then automatically add the Last Name field. This field is a required field and can not be deleted.
• Go to the Properties tab, name the form and click the purple Save button.
• For Type, select whether you want to create a Members form or an Activities form. And click on save again.
• Go to the Fields tab add the desired fields with the yellow +
• You can change the order of the fields by dragging the fields to the right place with the move icon. Do not forget to click on the purple Save button again.
Where are the completed forms stored?
The details of a member management link form come in as an external mutation in the member management where you can further process the data.

Depending on the settings in the Characteristics tab the data will also be mailed to the e-mailaddress of the association. The data is always saved with the form in e-Captain itself as well.


In the Characteristics tab you can set the parameters of the form. For a general form, the Properties tab looks like this:
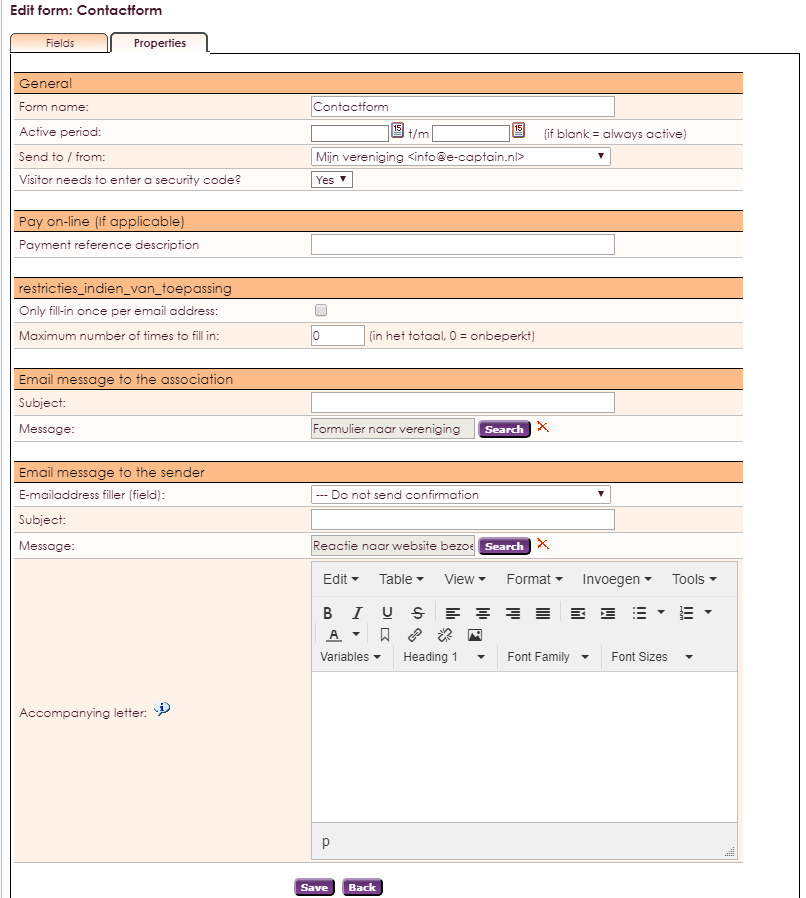
| General | |
| Form name | Enter the name of the form here. |
| Active period | Specify here the period that the form must be active. If you leave the fields blank, the form is always active. |
| Send to / from | Select here the e-mail address that is used as the sender when sending the e-mails. Completed forms are also e-mailed to this e-mail address. |
| Visitor needs to enter a security code? | If this option is set to YES, the visitor must copy a code to send the form. This is to prevent SPAM. |
| Restrictions (if applicable) | |
| Only fill-in once per email address | If this option is checked, the user can fill in the form only once per specified e-mail address |
| Maximum number of times to fill in | By default, this option is set to 0 and the form can be filled in without limit. If you enter a number here, the form can only be filled in at most that number of times. |
| Email message to the association | |
| Subject | Enter the subject of the e-mail that is sent to the association. |
| Message | Select the template to be used here. By default, the template is Formulier naar vereniging (Form to association) |
| Email message to the sender | |
| E-mailaddress filler (field) | Select here the Email field to send a copy of the form to the user. To be able to select an option here you must use the email field in the form. |
| Subject | Enter the subject of the e-mail that is sent to the user |
| Message | Select the template to be used here. By default, the template is Reactie naar websitebezoeker (response to website visitor) |
| Accompanying letter | To reduce the number of e-mails you have, you can also place an accompanying letter here. You need fewer mail messages if using an accompanying letter. Imagine that you create one template in which the accompanying letter can differ by form. In case you would like to use a completely different mail message, you can select another message above. |
Membermanagement link form has a different lay-out of the Properties tab:
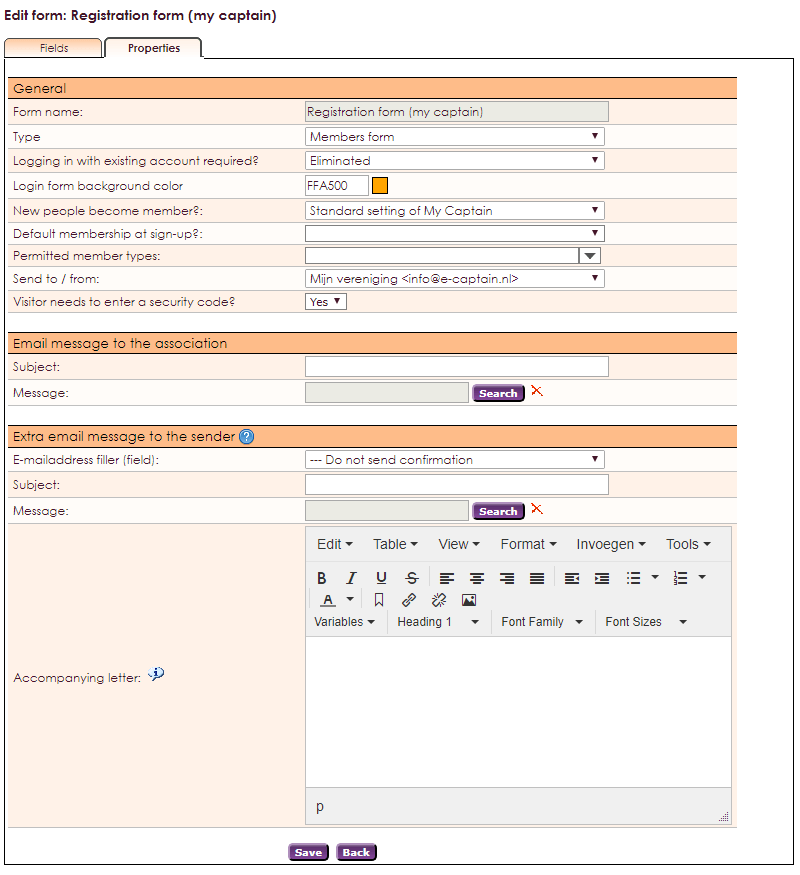
| Algemeen | |
| Form name | Enter the name of the form here. |
| Type | Selecteer hier Ledenformulier of Activiteitenformulier. Aan een activiteit kan uitsluitend een Activiteitenformulier worden gekoppeld. |
| Inloggen met bestaand account verplicht? | Moeten gebruikers verplicht inloggen voor dit formulier? Keuze uit 4 opties. Als dit verplicht is moet de gebruiker inloggen om het formulier te kunnen invullen. |
| Inlogformulier achtergrondkleur | Deze optie is alleen van toepassing voor Websitebeheer 1 gebruikers. |
| Nieuwe aanmeldingen worden lid? |
Worden gerbuikers van dit formulier ook lid van de vereniging? Keuze uit 4 opties. (optie alleen bescikbaar bij Ledenformulier) |
| Standaard lidmaatschap bij aanmelding? | Selecteer hier het soortlid dat iemand krijgt als die zich via de formulier aanmeld. (optie alleen bescikbaar bij Ledenformulier) |
| Toegestane lidsoorten | Selecteer hier de toegestane lidsoorten. (optie alleen bescikbaar bij Ledenformulier) |
| Verzenden naar/vanuit | Selecteer hier het e-mailadres wat als afzender wordt gebruikt bij het verzenden van de e-mailberichten. Ingevulde formulieren worden tevens naar dit e-mailadres gemaild. |
| Bezoeker moet beveiligingscode overnemen? | Als deze optie op JA staat moet de bezoeker een code overnemen om het formulier te kunnen verzenden. Dit is om SPAM te voorkomen. |
| E-mailbericht naar vereniging | |
| Onderwerp | Vul hier het onderwerp van de e-mail in die naar de vereniging wordt gestuurd |
| Bericht | Selecteer hier de template die moet worden gebruikt. Standaard is dat de tamplate Formulier naar vereniging |
| E-mailbericht naar de persoon die het formulier invult | |
| E-mailadres afzender (veld) | Selecteer hier het veld E-mailveld om een afschrift van het formulier naar gebruiker te sturen. U dient dan in het formulier het e-mail veld te gebruiken. |
| Onderwerp | Vul hier het onderwerp van de e-mail in die naar de gebruiker wordt gestuurd |
| Bericht | Selecteer hier de template die moet worden gebruikt. Standaard is dat de tamplate Reactie naar websitebezoeker |
| Begeleidend schrijven | Om het aantal e-mailberichten dat u naar een gebruiker stuurt te verminderen kunt u hier ook een begeleidend schrijven plaatsen. |
If you created a form you can add this to your website by using the Forms widget widget Formulieren.
You can read how this widget works here: deze pagina.
If you added the widget Forms to a page, an user will be able to see the form on the website. You can see an example of both options:
