With the Web Sales module you can enter additional properties for articles such as text and images. These articles are shown in a web sales environment, which you can give a place within your website. Customers can place orders here. If you use the Web Sales module, the Web Sales and Stock items will appear in the Administration Center. The Stock item will also be added to the main menu. More information about the stock module can be found in this document.
Since the Stock module can also be used without a webshop, (with the Cash register module, for example) this functionality is included in a separate manual).

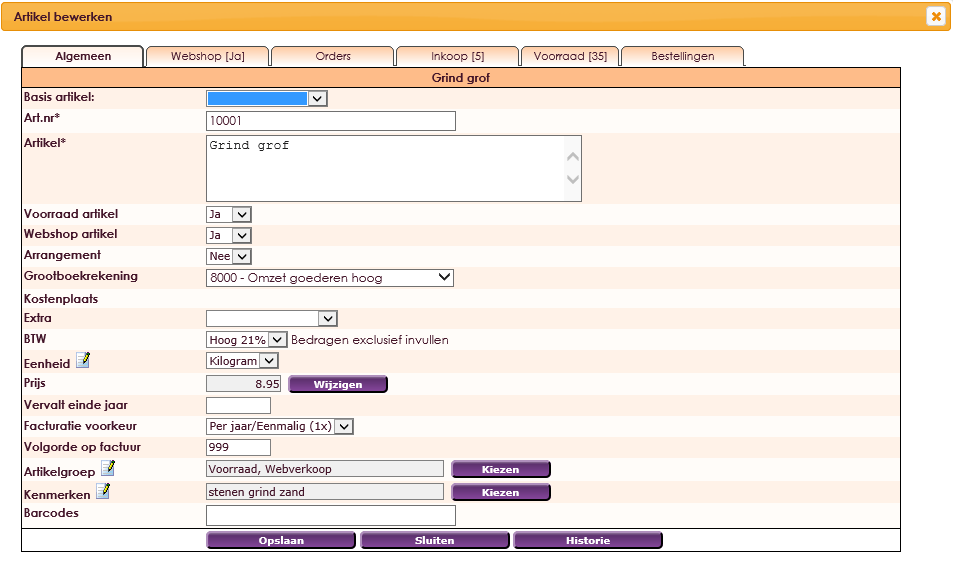
Because you will always use consumer prices in a webshop, we recommend using the VAT code High 21%. If this is not activated, the helpdesk can activate it. Ditto for Low 6%. The advantage of these VAT codes is that you enter the price including VAT and that e-Captain recalculates the VAT.
For some items it can be useful to create a so-called basic item. Think for example of a t-shirt where you offer different sizes. The t-shirt is the same in all cases but only the size deviates. By creating a basic article you can link the other corresponding articles (eg the different sizes) to the basic item.
First, a basic article must be created. In Item management you create an item. To make a basic item of that item, Inventory item and Webshop item must be set to YES. You will then see an extra option Characteristics.
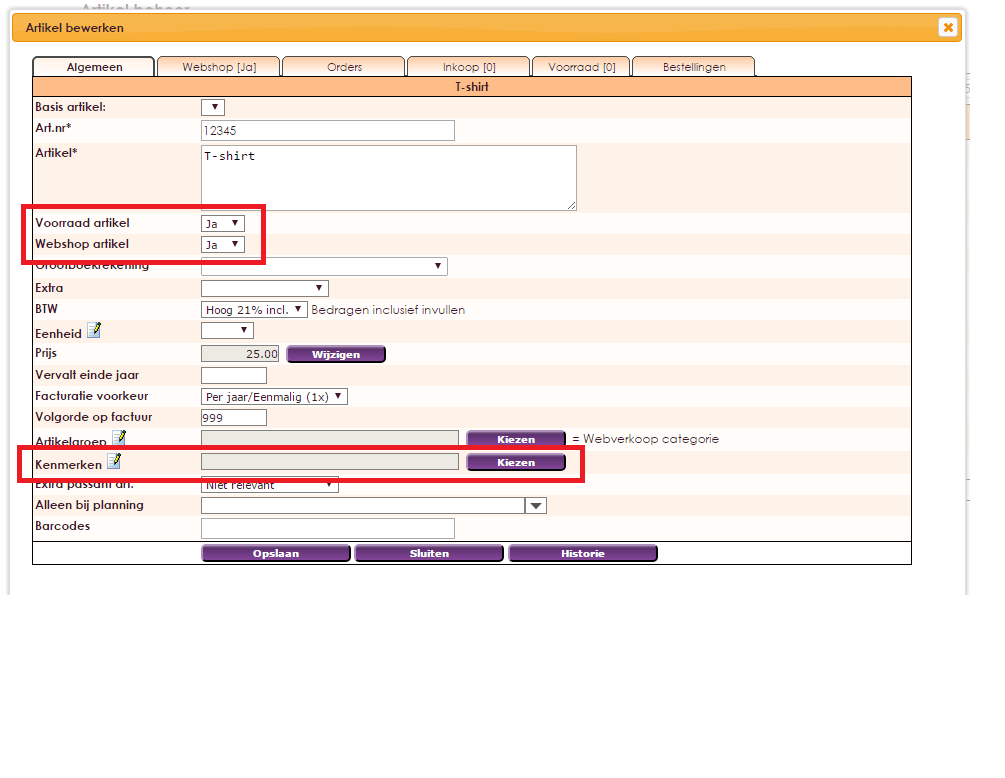

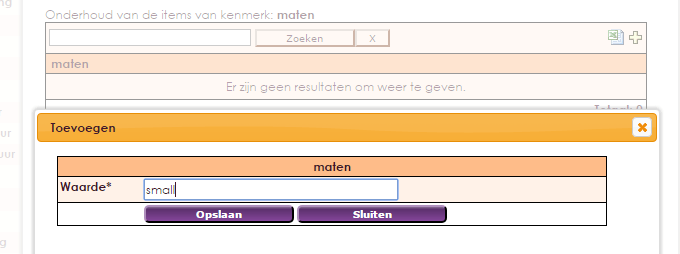

Fill in the remaining fields and tabs that apply to your article and click on "Save".
Now you can enter the different sizes of t-shirt as an article. Create a new article again and set the Stock article and Webshop article options to YES. You can now select the corresponding basic item at the top of the screen. You will then receive an extra option Variant with which you can select the desired size.
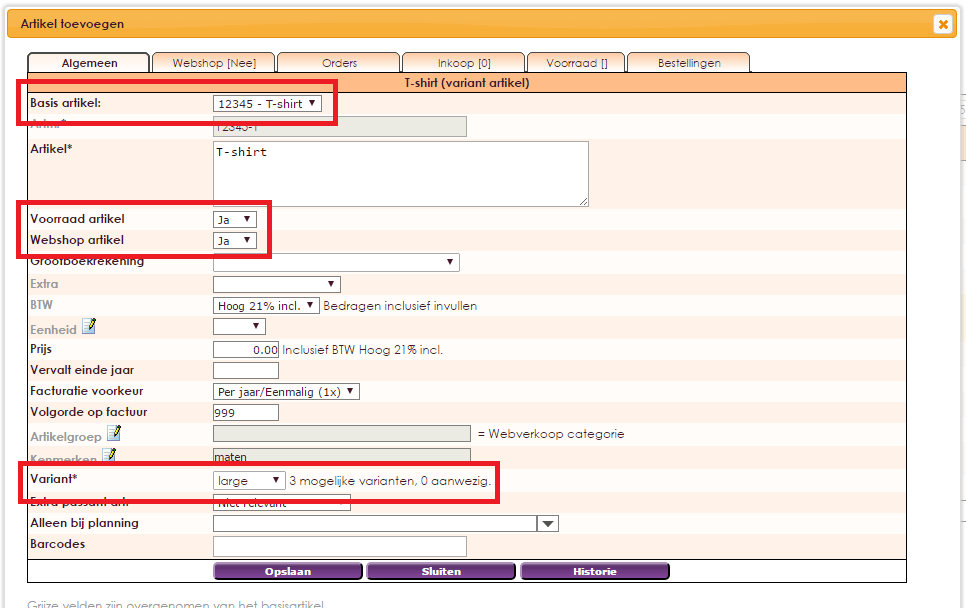
You can now see a t-shirt in the webshop with the option of various sizes.
Fill in the specific data for the webshop.
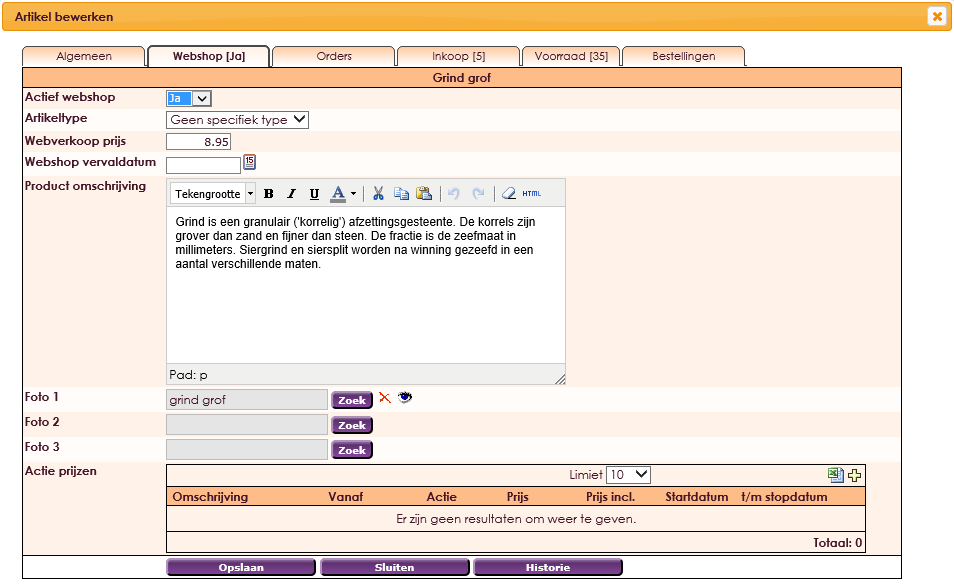
• Active webshop: whether the item may be visible at the moment.
• Item type: empty by default, items you use to bill / post shipping costs are set to Shipping.
• Web sales price: The price must be set separately so that you can use a different price in the webshop than in e-Captain or the cash register.
• Webshop expiry date: Set here the expiration date of the webshop article.
• Product description: The long text, you can format the text using the font, bold, italic, underline and color buttons.
• Photo: The first photo is shown when searching / browsing. If clicked through, the first photo is shown large and the three photos in the small next to it.
On the Webshop tab it is also possible to create promotional prices for a specific item. The promotional prices are entered on date and by number.

Open the article you want to set an promotional price for.
• Navigate to the Webshop tab.
• Click on the + icon in the Action prices table to enter a new promotion price.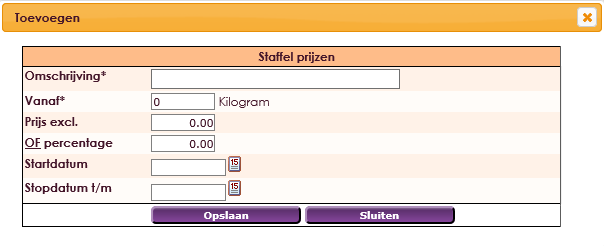

If you have created a few articles, we can set the outside. To prevent accidental visitors from entering the web shop you can restrict access:
• In the main menu, choose Management Center.
• Click on the Web Sales section.
• Select the item Web sales settings.

• Fill in the IP addresses with access among yourself.
• For the rest the menu shop is visible, but if you click on it you will see a standard message The webshop is under construction. Your ip address is: xxxx.
Set the settings for the web sales environment, this is done via:
• In the main menu, choose Management Center.
• Click on the Web Sales section.
• Select the item Web sales settings.

Set the settings for the web sales environment, this is done via:
• In the main menu, choose Management Center.
• Click on the Web Sales section.
• Select the item Web sales settings.
• E-mail sender confirmation of receipt: E-mail address of the selling party, from which the confirmation of receipt is sent.
• Sender name confirmation: Name of the selling party that is visible on the confirmation of receipt.
• Pick-up order possible ?: When choosing Yes, the customer is given the option to choose for pick-up. If you choose Yes, you can make sure that collection is the only option.
• Place letter W after invoice number ?: The W (ebale) is placed after the invoice number to indicate that it is a Web sales article.
• Payment methods: From which payment methods can the customer choose. iDeal, Sofort and Mister Cash are only selectable if you are connected to this.
• Transaction costs: With transaction costs you can link an item from Product management with which you can charge additional costs. Note: these articles must be in the item management in the Webshop tab on the type Shipping / transaction costs!
• Shipping costs free from spending: If the total order amount is greater than or equal to this setting, no shipping costs will be charged.
The web sales module supports different types of payment methods for the settlement of the orders. When you check the various payment methods, you will see that additional options become available in the Web sales settings.

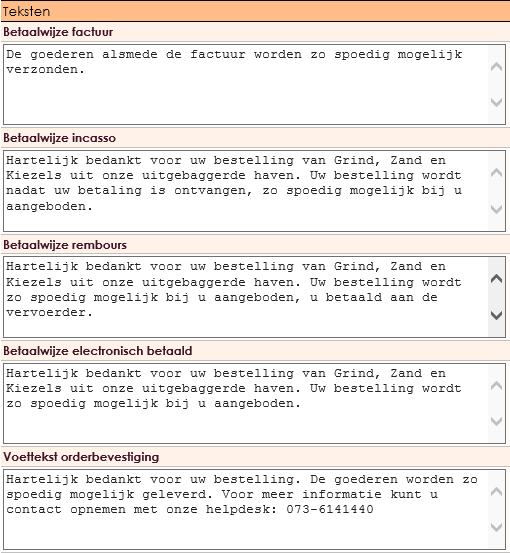
By payment method you can set which text appears on the screen of the customer as the conclusion of the transaction. The footer order confirmation is the text that comes under the PDF that the customer can retrieve via a link on the closing page.
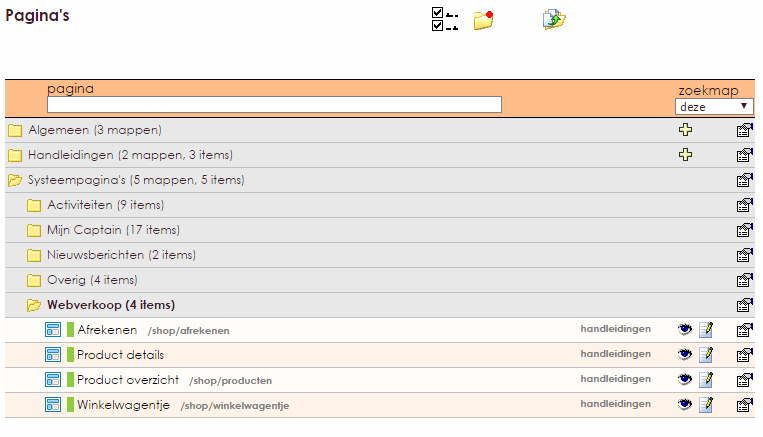
Users of Website Management2 can find an additional Web Sales folder with four system pages at the System pages.
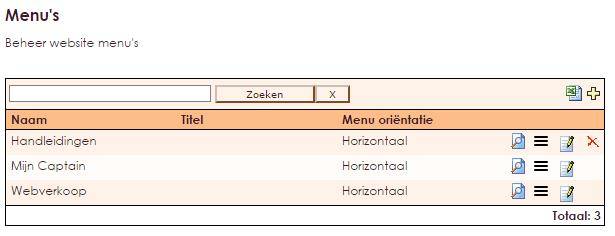
At menus an extra website sale is added.
In the product overview system page you can set the parameters of the yellow block "Web sales: Product overview" by clicking on the edit icon.
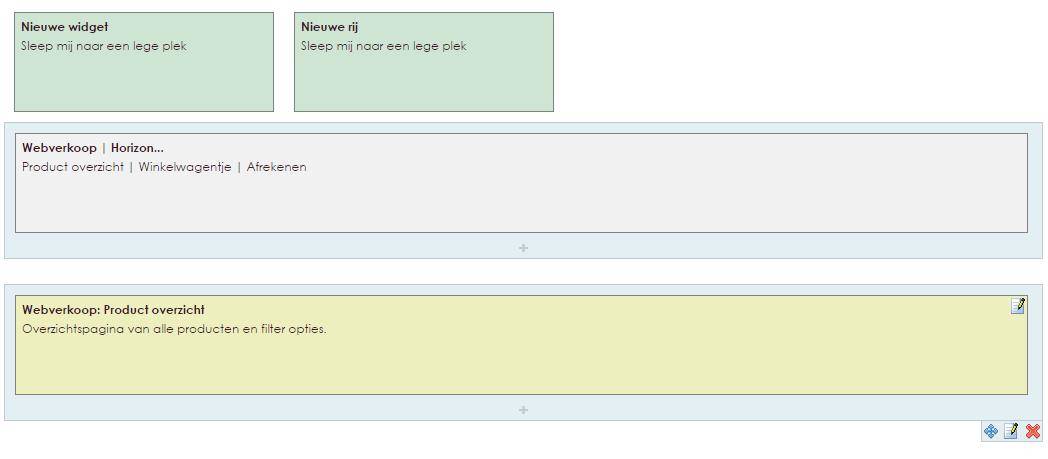
You can set the following parameters here.
• Text color article price.
• Color slider.
• Number of items per row.
• Fixed height image.
• Number of items per page.

In the system page Product details you can set the parameters of the yellow block "Web sales: Product details" by clicking on the edit icon.
You can set the following parameters here.
• Fixed height image.
• Text color article price.

In the system page Checkout you can link a different form of the yellow block "Web sale: Checkout" by clicking on the edit icon. If you do not set anything here, the standard Web Sales form (standard form) will be used.

You cannot set any parameters.
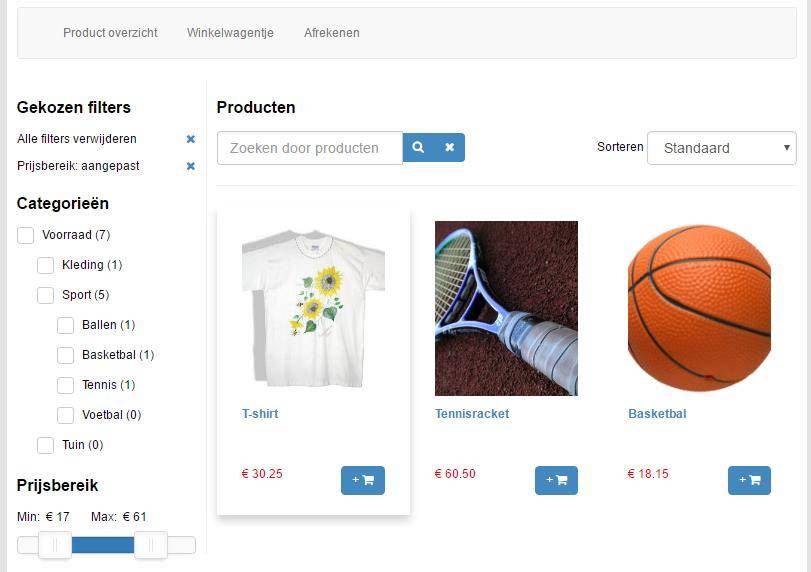
The system page Product overview shows all articles that you have marked as a webshop article. In addition, the website visitor can use filter options, select specific categories and specify a price range with the help of a slider.
The styling of the page is taken from the themes you have created.
The orders from visitors to your web sales environment are visible in the Orders submenu of the Inventory module.
• Click on Stock in the main menu.
• Select Orders in the submenu.


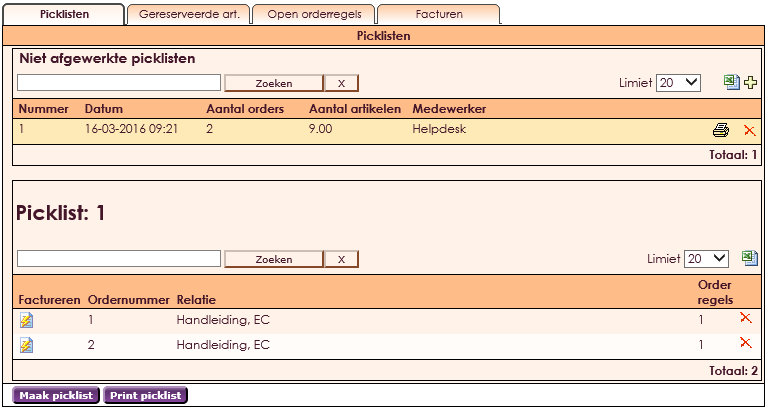
After you have established that an order has been made, this order will have to be delivered from the warehouse. The customer will also be invoiced. You do this via the Picklist menu item.
• Click on Stock in the main menu.
• Select Picklist in the submenu.

• With a picklist you can collect the items from the order from the warehouse and prepare them for shipment.
• Click on the Create picklist button to create a new picklist.


If the orders have been collected in the warehouse using the picklist and are ready for shipment, or have already been shipped, they must still be invoiced. This only applies to the orders that have been ordered under Cash on Delivery or Direct Debit.
• Click on the pick list that has been handled and is ready for shipment. This opens the screen where the individual orders are located.

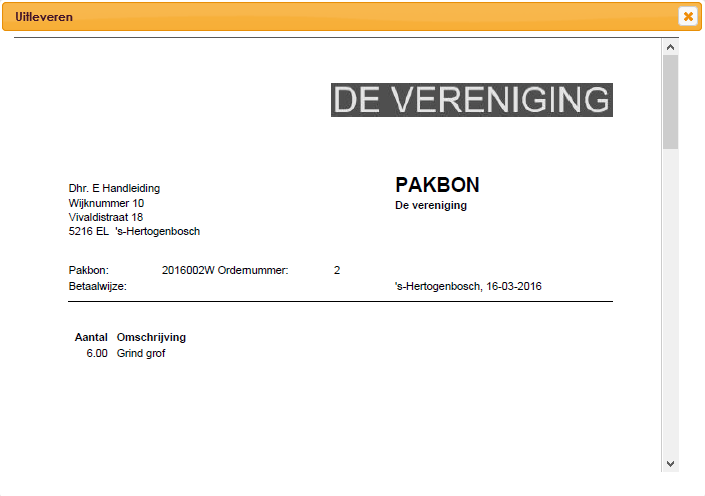

The explanation of the letters behind the invoice number is as follows:
W for Webshop
E for Electronic payment
If you have a combination, the system puts 2 behind it. So a webshop invoice that is paid online will then become 2017001WE for example. A webshop invoice that is paid per invoice is for example 2017002W.
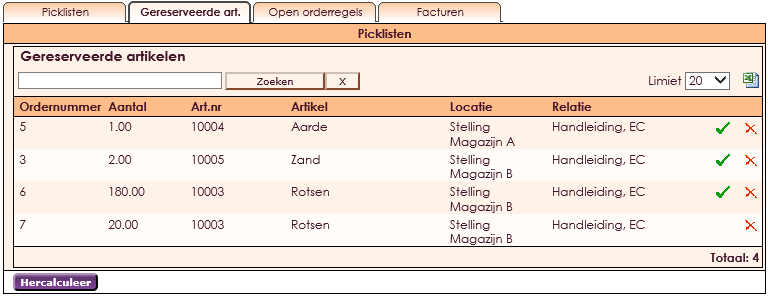
On the tab Reserved items you can see all items that are on order. The check mark indicates that the items are in stock in the warehouse. If items are not in stock, these will be automatically ordered via the stock module, provided that they are set up. If the order is ordered via web sales, the customer will be notified that the order is being delivered and the missing items are delivered later. The reserved items will disappear from this overview after you have created a picklist.
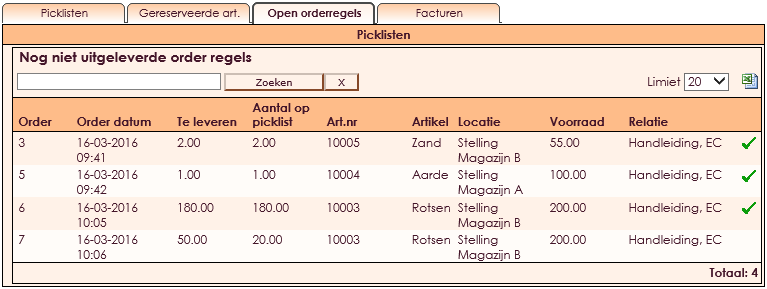
The Open order lines tab shows the order lines that have not yet been delivered.
e-Captain has a very extensive Member Management package. We offer several basic trainings which teach you to work with e-Captain in an accessible way. The trainings take place at our office in 's-Hertogenbosch.
To be able to support you optimally, it can be easy to look with you on your computer from a distance. We use TeamViewer to do this. TeamViewer makes it possible to take over your computer from a distance.