The Mailing module, uses certain aspects of the website maintenance module, specifically the sections Images, Files and Styling. These sections explain how to add images and/or files to e-Captain, thereby making them available for use in emails, newsletters and on the associations website. These sections also explain how to create Style Sheets. In the section Templates, you will learn how to create a house style for your association which can be used for invites, emails and the website.

Once the images or files are uploaded, the styling is set and you’ve created templates, you’re ready to send emails.

Before we send an email we will first create a concept (or draft). Once the concept is finished to your satisfaction you can send it to the target group you have in mind.
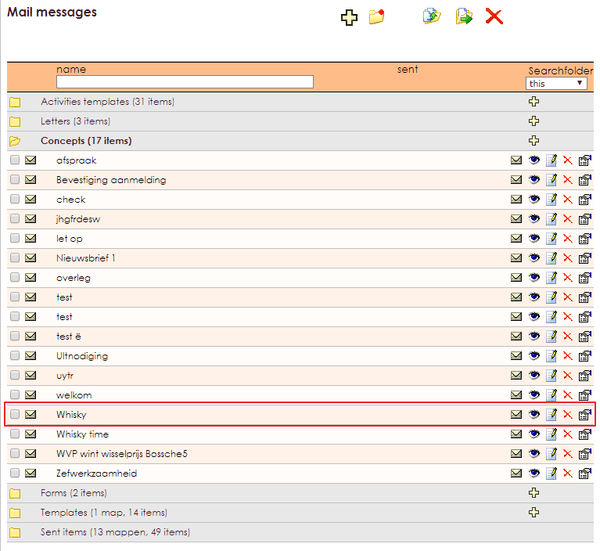
Once you open the Concept folder you’ll see a list similar to the one above. This folder contains any concepts. It may also be that the folder is empty. This will be the case if you’re making a concept for the first time or if you’ve made and already sent a concept. A concept message which has been sent will appear in the sent items folder.


you will go through to the email editor. You can give the email a name. This name will also be used as the Subject when you send the email.

Below the name field is your text editor. Enter your message here.

 |
In this menu you can select the style sheet you’ve created in the Styling section. |
 |
The second option gives the paragraph style. This hasn’t yet been implemented in e-Captain. |
 |
In Font Family you can select your preferred font. |
 |
In Font Size select the size font you prefer. You can use a selection of fonts and font sizes in each message. |
 |
In the last option drop down box you can select from a range of available variables to use in your message. |

It's time to send the mail. Behind the line you can see a selection of icons.

| Send e-mail / send e-mail test | |
| Preview e-mail | |
| Change e-mail message | |
| Delete e-mail message | |
| View message properties |

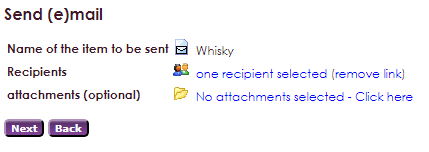
In this example there are not yet any recipients selected for this email. Your membership list will be opened and you can select which individuals/groups receive the email by clicking on the blue text: no recipients selected – click here.

Once recipients are added you can also add an attachment to the message.


An email sent from e-Captain can have a maximum size of 2MB. therefore files larger than 1.5MB will not appear in the list.
If you wish to send larger files to your members we suggest you place a link to the document in the text of your email. The reason for this maximum size is that inboxes quickly fill up with larger messages, and sending a link is faster and uses less data.
Once recipients are added you can also add an attachment to the message.


An email sent from e-Captain can have a maximum size of 2MB. therefore files larger than 1.5MB will not appear in the list.
If you wish to send larger files to your members we suggest you place a link to the document in the text of your email. The reason for this maximum size is that inboxes quickly fill up with larger messages, and sending a link is faster and uses less data.
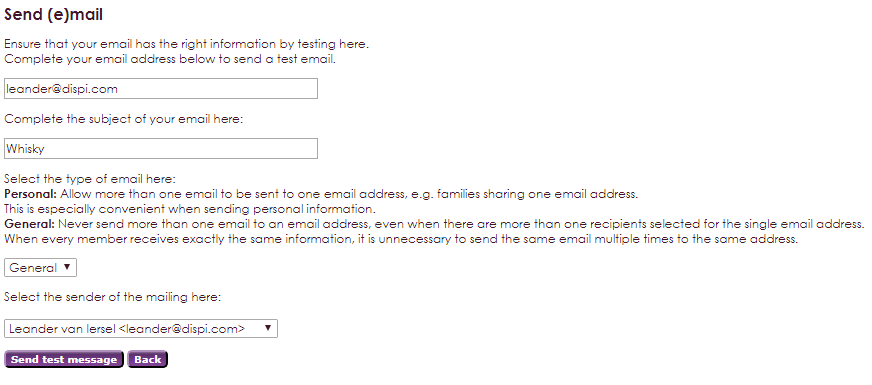
The following screen is opened. In this screen it is possible to first test the message.


In the screen above you can see a list of members who cannot receive the email. These members either do not have or have an incorrect email address in their contact details. you are now able to correct or add these email addresses if you have them.


If you click on the first icon in the item line, you will see a list of sent and unsent emails. In the example below, the test email was sent without adding the address of Mr Pietersen, so he will not receive this message.

If a member does not have a valid email address, it is possible to send the message to them by post.


If you send a newsletter regularly which you want to display on the website, there is a possibility within the e-Captain Mailing Module to show this in website item Nieuwsberichten.

You have to complete this newsmessage yourself. The title and content are already filled in for you.

Several checks are built in when sending a mail to warn you when something is wrong with the sender. Known providers like Gmail, Outlook etc show this;

If you choose for a different domain, e-Captain checks the SPF-record of the sending domain. Is there nothing about it in our serves, the next notification will be shown:
