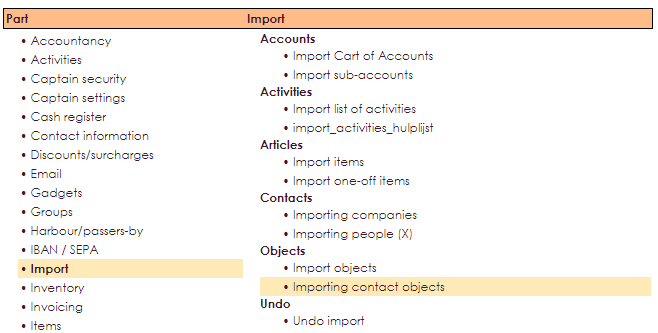
Before you can import relation objects, you must first define Relationship objects. For this, go to the Management Centre.
Here you can define different types of relationship objects.
Warning! e-Captain can only import from the first tab in your MS Excel file!
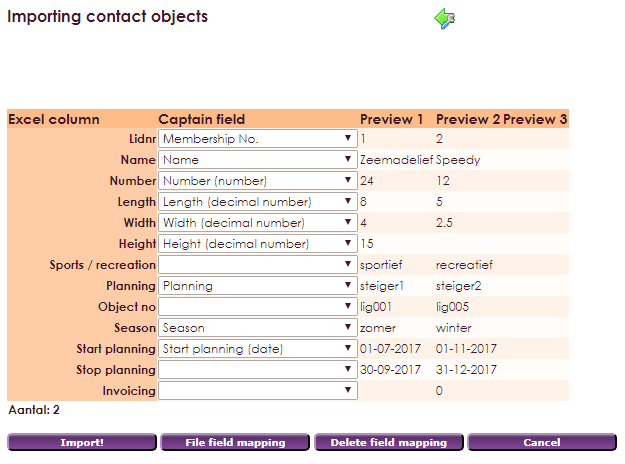
To import the relationship objects into e-Captain, the following steps must be taken:


You have now imported your Excel file. You will now also receive the following message on your screen indicating how many items have been imported from all items.

For the import within e-Captain the 1st column (A1) of the Excel document must start with the field member no.
The first row of the Excel document must consist of the field names, this is the header.

You must ensure that unique member numbers are listed in the A column. The relationship object can only be linked to an existing contact card. If the membership number does not appear in your file, the record will be skipped.
Tip: If you use the same field names in your Excel document as mentioned in this document, e-Captain will automatically know how to link them.
| Object data | Possible values |
| Member no | Compulsory 1st column |
| Name | |
| Number | |
| Length | Comma number |
| Width | Comma number |
| Height | Comma number |
| Sports / Recreation | Sports or Recreation |
Tip: You can define depth in the free fields
Free Fields
| Memo field 1- 6 | |
| Date field 1- 6 | |
| Number 1 – 6 | Comma number |
| Number 1 – 6 | Round number |
| Yes/No 1-6 | |
| Selection field 1-8 | Expected values in a selection field, the selection field items. For example header field A1 Material with values in A2, A3 etc: wood, polyester, metal etc. |
| Textfield 1 – 6 |
The free fields are automatically assigned the name that is listed in the first row (header). You dont have to define this in advance.
Planning data
| Planning data | Possible values |
| Planning | Exact name of an existing planning |
| Object no | Existing object number from previously indicated schedule |
| Season | (Season, Manual, Summer Season, Winter Season) If blank then season will be used. |
| Start Planning | Start date of the planning (only if season manually) |
| Stop Planning | Stop date of the planning (only if season manually) |
| Invoicing | (blank if Autmatic calculation according to definition (standard), Amount if manual overrule, 0 if not calculated) |
Do you want to schedule the object you import directly in the planner? Make sure that you have created your plans first.
Example: You want to import boats. First create the category of jetty. Then create the planning for jetty A, jetty B etc. You can create the boxes manually or you can also import them via:
Do this before importing the boats (relation objects). Make sure that you indicate in your Excel file of the objects in which planning the object should be planned. You can do this in the Planning column. You must also indicate which object the planning belongs to. You can do this in the column Obj. No. (number of the box).

In the example above, you can see:
The start and end date of the planning is taken from the group definition "jetty" and therefore does not need to be imported. The Invoicing field is blank. This means that the price is automatically calculated via the definition.
We have made an example import document for you. You can download it below.